Replacing outdoor wall light fixtures
- Kiersten
- Feb 15, 2021
- 4 min read
Updated: Apr 15, 2021
While the boys were busy tearing down trees (if you missed that epic video, catch it here), my attention shifted to replacing the outdoor light fixtures on the front of the house. They were functional but not beautiful. The finish was weathered and worn (and of course, orange). They also were pretty small and I felt like the scale wasn't quite right for the front of the house. So, while the weather was still nice, I thought this would be a good project to cross off the list.

I considered spray painting them for a quick fix, but didn't love them enough to keep them even if they were a fresh color. So, I started searching. I did a fair amount of online browsing while trying to get inspiration.. While I am naturally drawn to more of a farmhouse lantern style like these from Home Depot, the front of our house is more traditional looking so I felt like after some soul searching (and Pinterest browsing) a more classic style would be better.

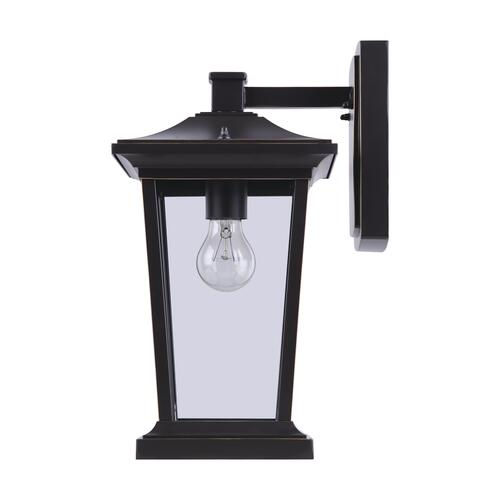
I wanted them to be a dark, preferably black finish of larger scale and landed on these from Wayfair. I loved how big they were and the candlestick design of the light fixture. So cute! Kind of traditional, kind of modern. Seemed perfect!

They arrived and I called my go-to electrician and sweet talked him into coming over for an install... AKA my dad. Not an actual electrician, but pretty dang close. He's got an electrical kit he keeps packed and ready for house calls from us kids. He arrived and brought my mom along who helped me get everything unpacked and ready for install.
But we had a problem. I measured everything right, including the plate size that needed to cover the electrical box, but the box was installed too close to our decorative stone! There was not enough space from the back of the lantern to the wall to account for this stone! Ugh! See that little stone section that sticks out in the photos below?


Short of taking a chisel to the stone (you know it crossed my mind!!), I needed a lamp with more clearance to the back. Since "number of inches from back of lantern to plate" is not a standard spec, I had to take my search to the local shops. I went to a local lighting store thinking I'd start with the people who only sell lighting to see what they had to say. Out of all of their outdoor fixtures, there was ONE that wold work but it was on back-order for months. I hit up my trusty Home Depot and talked a guy into letting me open up a couple boxes to measure. Nothing. Lowes. Still nothing. Then we hit up Menards. I tell you, walking into those lighting stores is just some sort of magic.

I drug my son around the whole store and we found one! It wasn't black, but it was a classic lantern style and darker than most of the other bronzes in stock so I settled. Plus with the taper of the shape of the lantern, it had the clearance we needed. Of course they only had one in stock and I needed 3, but luckily we've got two stores within 10 miles of each other so I could get what I needed with an additional stop.

I got on the schedule with my dad (he retired just in time for this move!) and with just a little extra maneuvering and one more run to Home Depot for some longer machine screws, we got them to work.
He did the first two, but I had to do the last. Because if you teach a girl to wire her own fixtures... hmm, I don't know if I like where this is going...

A bigger job than I expected (and that it really should have been), but the outcome I was hoping for! These light fixtures are almost like earrings as weird as that sounds. The right ones really help provide a great final polish to the style of the house! I paired them with these decorative globe LED lightbulbs for an extra pretty finish.


PS - I forgot to mention, when I had the door paint out, I used a Q-tip and gave our house numbers a fresh coat of paint. They were pretty weathered too. A little extra attention to detail can make a big difference!
Need a Fix Up? Here's what we used:
We heard you liked the rugs - get yours here:
Buffalo Plaid Outdoor Rug for Front Door (affiliate)
Welcome mat is no longer available but here's one I really like! Or this one might be my next purchase. This one gives you the same look with just one mat if you don't have the extra space to layer. (affiliate)
DISCLAIMER: This post contains affiliate links, which means that if you click on one of the product links, I’ll receive a small commission at no extra cost to you. This helps support our DIY projects. Thank you for your support!


Comments